Knowledge Base
Artworks in 3D/Pro Mode
CREATING AN AR ARTWORK IN 3D/PRO MODE
Artivive also offers advanced features in the 3D/Pro mode, which is only available for Pro, Pro Plus, and Business subscriptions. You can also start with a 14-day free trial! Watch a full tutorial here.
While the basic mode’s advantage is ease and simplicity, 3D/Pro allows you to have more control over your project by adding more layers, adding 3D objects, and controlling the placement, scale, and rotation of the layers in the space around the artwork. In this mode, you can build a more complex artwork like a digital sculpture.
You can go to 3D/Pro mode by clicking the button “3D/Pro” button. Please make sure that your browser is on fullscreen to see this option.
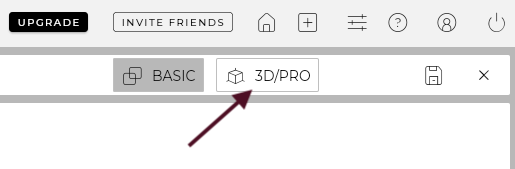
If you don’t see the button, please make sure that you are working on a computer or laptop and that the window is maximized in size.
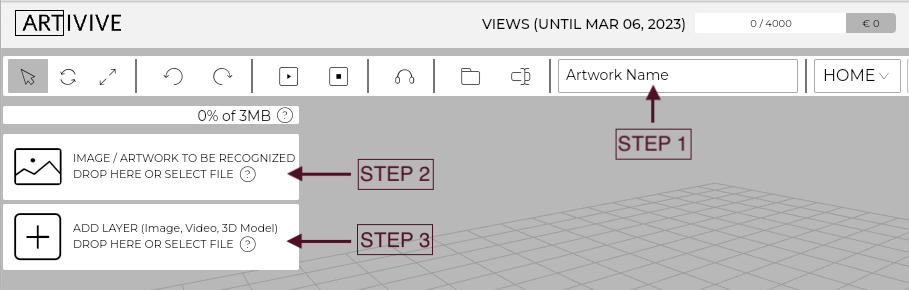
1. As with the Basic Mode, start by naming your artwork.
2. Drag and drop a trigger image.
3. Then, you can add up to 3 video layers up to 100MB and up to 3MB of non-video layers (including 3D objects), or up to 5MB of non-video layers if you are our Pro Plus or Business subscriber
4. Have fun with the features! Including scaling, rotating, moving the layers around, adding text layers, and even duplicating the layers. Find out more about all the 3D/pro features in our FAQs.
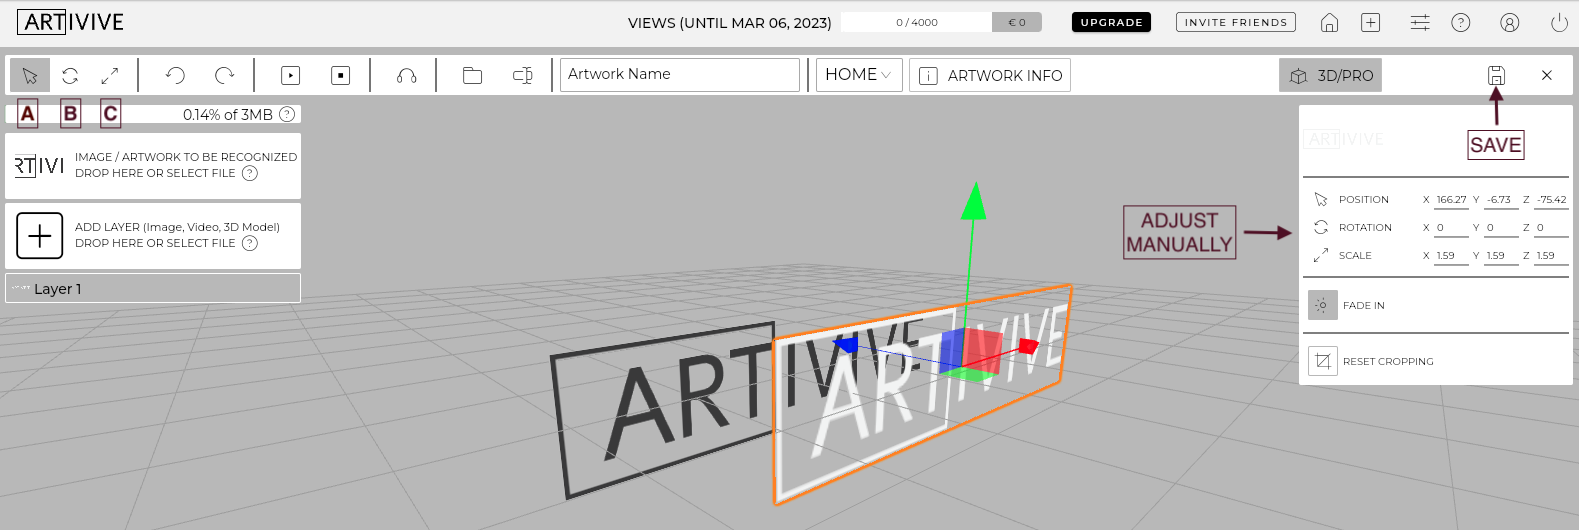
ADJUSTING THE LAYER’S SIZE, ROTATION, AND SCALE
1. You are able to change the position, rotation, and scale of each layer. You can do so by simply clicking on a layer and selecting one of the tools in the upper left corner:
A) Move the layer
B) Rotate the layer
C) Scale the layer
You are also able to manually change the values of the position, rotation, or scale of each layer using the sidebar on the right.
2. Once the layers are adjusted to your liking, click the “save” button and let our platform do the magic.
3. Shortly, it will appear in your artwork collection on the home page.
And that’s it! You have successfully created an AR artwork.